May 05, 2014

Dragon's Chevy construction done

This proved to be one of the most challenging braille scale projects I have ever built. It was both expensive and time consuming, and the kit itself delivers too little for how much it costs. I had to buy an aftermarket PE set from Hauler and a set of resin wheels from the same Czech manufacturer in order to fix a least some of the problems.

All the major parts of the constructed kit are not glued permanently. Beside the PE set I scratched a few details myself, and replaced others, while for the “textile” parts I used Milliput. The front turn signals are entirely scratched, as Dragon “forgot” to include them in the kit. There are few more details to add: a Lee-Enfield rifle and some small tools, and, of course the Lewis Gun. For the sand mats mounted on top of the front fenders, I’m thinking of using Milliput also, it was a first time for me and proved to be a very useful material.

This time I will use Mr. Hobby Acrylics paints instead of my usual Vallejo. It will be sandy yellow with patches of light blue.

In conclusion, this is a great subject but a mediocre kit, don’t be fooled by the nice covering box, some efforts are required to turn this Chevy into a good model for display.

April 09, 2014

A short preview

Working with PE from Hauler on the cab.

February 24, 2014

LRDG Patrol Car with Lewis gun from Dragon

Well, after seeing this:


I ended up buying this:


Though there are good parts, the general impression is the kit was done in a hurry. The biggest disappointment are the wheels; they are one piece, not like the CAD drawings on the box showing separate tires and wheel rims. All four road wheels look the same, but in reality the bolt circles of the back wheels is noticeably larger. The tire tread is not very deep and a there is an ugly moulding seam, whose removal will further damage the surface. And there is more bad news: all wheels were moulded with a hollow back!


So I’ve searched for a good PE set and Hauler came to my rescue. Besides metal parts, you get two beautiful Lee Enfields, a crate, some cans, a shovel – all in resin. Hauler also provides, as a separate upgrading set, four road wheels and two spares, an excellent representation of the real thing.


January 21, 2014

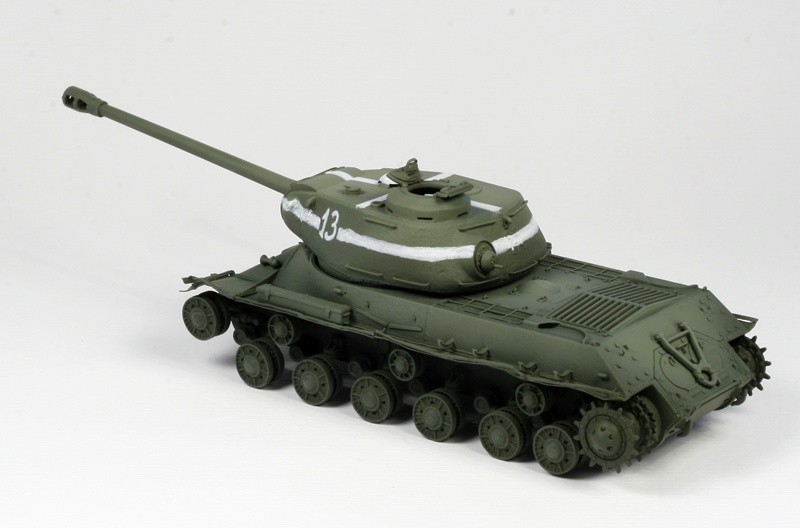
IS-2 finished

December 21, 2013

IS-2 – base coat

After the construction, I sprayed the model with Vallejo white acrylic primer (polyurethane), but I ended up with a grainy surface and not much adherence to the model. So I had to remove it and apply a new coat of Tamiya white primer from a can. Is lacquer based and worked better as it leaves a very smooth and hard surface.

After the primer, I covered the whole tank with Vallejo Russian Green and applied a little color modulation on more exposed areas. The white stripes and the turret numbers are hand brushed as it were in reality.

Next, I will apply an yellow oil filter to lighten up the green, and the rest of the weathering techniques.

December 04, 2013

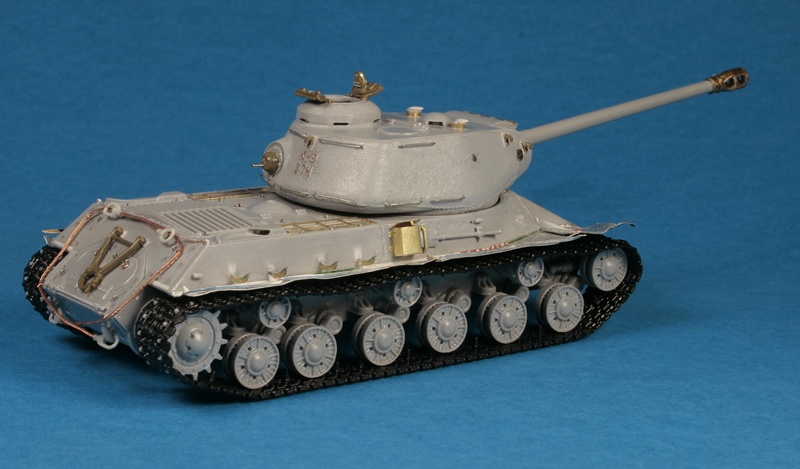
IS-2 construction done

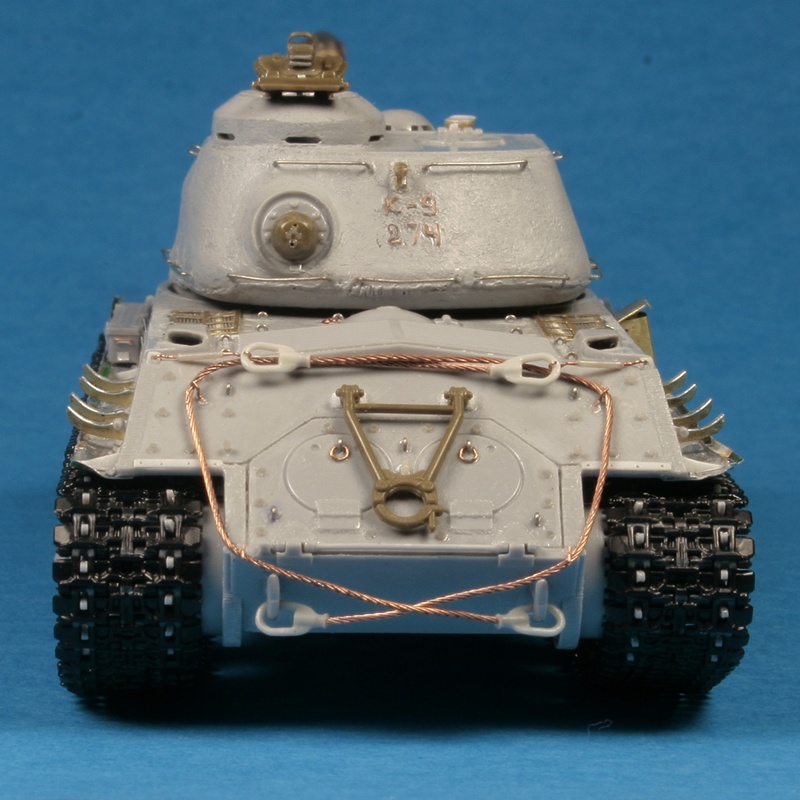
After the turret construction I started to work on the upper hull, by removing the original plastic fenders and replacing them with ones made from beer can foils. There is a photo-etched set from Part for the old PST and Italieri kits, but it doesn’t provide the fenders. The advantage of working with thin aluminium foils is that you can easily bend it; my reference pictures showed some very battered tanks, and all of them had bend, broken or missing parts of the fenders.

The joining lines on the nose of the tank are way too sharp and pronounced, so I had to sand it to gave a more rounded appearance. I then brushed and stippled a thin layer of Mr. Surfacer 1000 to obtain a rough casting texture, just like for the turret.

Next were the air intakes and their mesh screens. Zvezda offers a quite acceptable plastic replica, even better looking the the ones from Part’s set, which are nothing but some holes drilled into a brass plate. A Lipton tea bag proved again to be a great substitute, and I will definitely use it in my future builds.

I than added the MasterClub hexagonal bolts, after shaving off the original ones. I’ve described the whole process here. The lifting rings and other few small but time consuming details were next. The gun travel lock came from the Italieri kit, as it has superior details. The towing cables are from Eureka XXL and were a great addition.

One of the most difficult challenge was to make the supports of the side barrels. I used the main supporting ribs from Part (again, shortened with few millimeters), and glued can foil strips on top.

After that I moved to the lower hull, by adding the ammo loading hatch, which was missing. The tracks are very easy to work with, but unfortunately you can’t obtain a proper amount of track sag, or at least I couldn’t. The tracks are not attached permanently, for an easy painting, and I think is better to assemble them by gluing the ends and shave off the mounting lugs. This way you can test the sag and the tracks can easily be removed for painting (for this, the outer half of the road wheels and sprockets shouldn’t be glued permanently).

All in all, this is a good kit, but with a few shortcomings. Most important, it provides a good foundation for those obsessed with details, like myself. :)